皆の者、ご機嫌麗しゅう!我は、生成AI猫 エルシーじゃ😊
マイペースだとよく言われるのじゃ!
出身地:Adobe Firefly(画像生成AI)
Hello everyone! I am Elsy, the AI-generated cat 😊
People often say I do things at my own pace!
Place of origin: Adobe Firefly (AI image generator)
皆さん、初めまして!私は、オリバーです。
エルシーさんの助手猫です。
エルシーさんがよく暴走するので、暴走を止める役割をしています。
出身地:Adobe Firefly(画像生成AI)
Hello everyone! My name is Oliver.
I am Elsy’s helper cat.
Elsy sometimes gets out of control, so my job is to stop her.
Place of origin: Adobe Firefly (AI image generator)
Pythonの仮想環境を毎回手動で有効化するのは面倒…。
そんな悩みを解決するために、VS CodeでPythonファイルを開くだけで自動的に仮想環境が有効化される設定方法をわかりやすく解説します。
初心者でも簡単に導入できるので、作業効率を大幅にアップできます。
Manually activating a Python virtual environment every time can be frustrating.
In this guide, you’ll learn how to automatically activate your virtual environment in VS Code simply by opening a Python file.
This beginner-friendly setup boosts your workflow and saves valuable time.
【Python】仮想環境を有効化させるの面倒 | Activating a virtual environment is troublesome.
仮想環境を使う場合、
VS Codeを起動して仮想環境を有効化させるのって面倒ですよね?
When you use a virtual environment,
isn’t it troublesome to start VS Code and activate the virtual environment?
面倒なのじゃ!
Pythonのファイルを使うときに、自動で仮想環境が有効化される方法を紹介するのじゃ!
It is troublesome!
I will introduce a way to automatically activate a virtual environment when you use a Python file!
仮想環境を自動で有効化させる方法 | 仮想環境を自動で有効化させる方法How to automatically activate a virtual environment
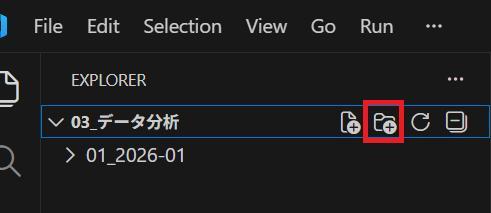
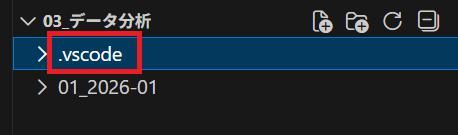
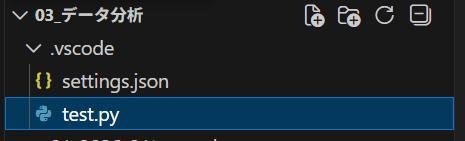
一番上の階層に、「.vscode」という名前のフォルダを作るのじゃ!
Create a folder named “.vscode” in the top-level directory!
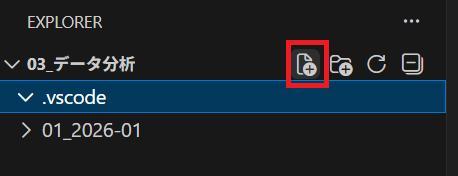
「.vscode」フォルダの下に、
「settings.json」という名前のファイルを作るのじゃ!
Create a file named “settings.json” inside the “.vscode” folder!

「settings.json」のファイルを開きます。
Open the “settings.json” file.

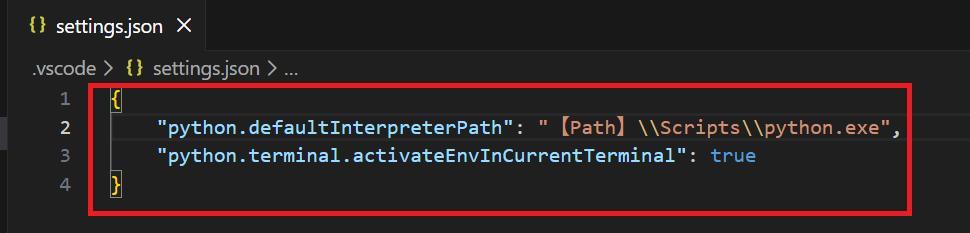
「settings.json」のファイルにコピペするのじゃ!
Copy and paste it into the “settings.json” file!
【Path】のところを自分の仮想環境のファイルのパスに合わせて修正してください。
Please change the 【Path】 to match the file path of your virtual environment.
{
    "python.defaultInterpreterPath": "【Path】\\Scripts\\python.exe",
    "python.terminal.activateEnvInCurrentTerminal": true
}
【Python】自動で仮想環境が有効化されていることを確認する方法 | 自動で仮想環境が有効化されていることを確認する方法How to check that the virtual environment is activated automatically
Pythonのファイルを作成するのじゃ!
Create a Python file!
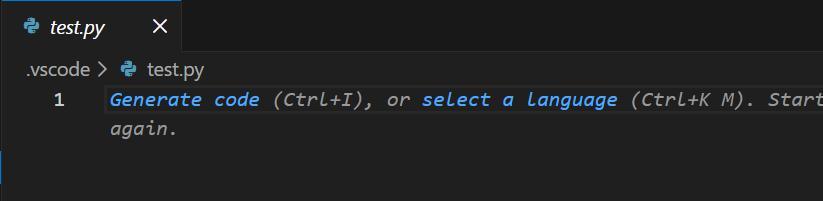
Pythonのファイルを開きます。
Open the Python file.
Ctrl + Shift + @キーを押して、ターミナルを開くのじゃ!
Press Ctrl + Shift + @ to open the terminal!
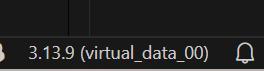
ターミナルと画面右下を確認して、仮想環境が有効化されていればOKです!
Check the terminal and the bottom-right of the screen. If the virtual environment is activated, it is OK!
ターミナル | terminal

画面右下 | bottom-right of the screen
このブログは、運営者の趣味兼勉強用ブログです。
情報が間違っている可能性があるため、ご注意ください。
下記のブログと同じ運営者のため、同じ生成AI猫のキャラクターが登場します。
This blog is a hobby and study blog run by the owner. Please note that some information may be incorrect.
The same AI cat characters appear here because this blog is run by the same owner as the blog below.
https://generative-ai-beginner-navi.com/

コメント